
How to connect to serial devices with Tio on Linux
Accessing a serial device in Linux is typically achieved using a command such as screen. But, with Linux there are always other options. I’ve used Tio for many years with my collection of microcontrollers. Why? Because it just works, and it is easy to use.
Windows users, here is another how to which will help you to make serial connections from Windows 11 and Windows 10.

I recently used Tio when hacking around with the new Ifixit Portable Soldering Station. I knew that Tio would make short work of the serial connection, enabling me to look under the hood of the smart soldering iron.
In this how to, we’ll show you how to install and use Tio with its default settings with a quick Raspberry Pi Pico 2 demo being the serial device. Then we’ll move on to specifying connection settings – for boards with a specific baud rate, before learning how to log all of the serial data to a text file for later analysis.
To follow along with this how to you will need the following.
- Computer running Ubuntu
- Raspberry Pi Pico 2 (or Pico / Pico W)
- DHT11 temperature sensor
- Half-size breadboard
- 3 x Male-to-male jumper wires
Installing Tio Via the Package Manager
We’re installing Tio on our laptop running Ubuntu 24.04, the same instructions apply for the majority of Debian based Linux distributions. For other Linux distributions, please check your package manager, as Tio should be available there.
1. Open a terminal and update the repositories list, then run a system upgrade. The update part is essential so that we get the latest list of packages. The upgrade is good housekeeping to ensure that all of your software is up to date. If prompted to confirm an upgrade, press Y.
sudo apt update
sudo apt upgrade
2. Install tio.
sudo apt install tioQuick Demo Circuit
For this, I’ve prepared a quick Raspberry Pi Pico 2 demo that uses a DHT11 temperature sensor to read the current temperature and print it to the Python shell. The output is what we will read over a serial connection. You don’t need to do this, the how to will still work with whatever serial device you connect to your computer. But with this quick demo circuit, I can show a typical scenario where Tio is used.
For this part of the how to you will need
- Raspberry Pi Pico 2 or Raspberry Pi Pico
- DHT11 temperature and humidity sensor
- Half-size breadboard
- 3 x Male to male jumper wires
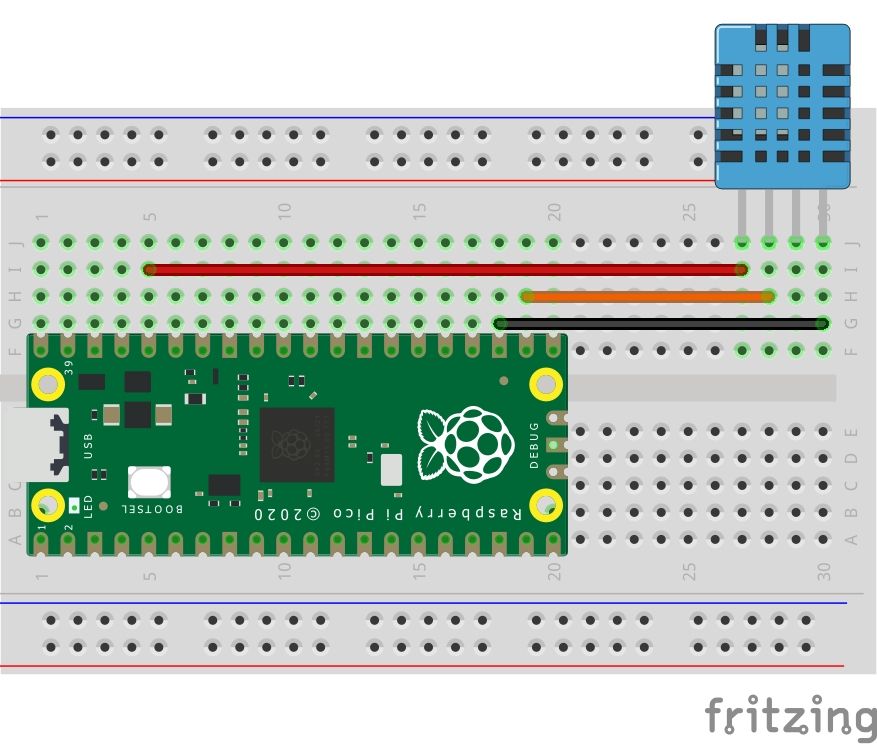
The circuit for this demo is simple. We are connecting power and data between the Pico 2 and the DHT11 sensor. The Pico 2 powers the sensor, and the data pin sends the necessary data to the Pico 2.
| Raspberry Pico 2 | DHT11 | Function | Wire Color |
|---|---|---|---|
| 3V3 Out | Pin 1 (VDD) | 3V3 Power | Red |
| GPIO 17 | Pin 2 (Data | Data out | Orange |
| Any GND | Pin 4 (GND) | Ground (GND) reference | Black |
Ensure that your Raspberry Pi Pico is running MicroPython, follow up to step 4 in this how to and you will have MicroPython and Thonny installed.
1. Open Thonny and create a new blank file.
2. Import three libraries of code. Pin, used to connect to the GPIO, time, to control the pause in our code, dht, an abstraction to make working with the DHT11 easier.
from machine import Pin
import time
import dht
3. Create an object, sensor, and use it to make a connection between the code and the DHT11 on GPIO 17. This abstraction makes it easier to work with the DHT11.
sensor = dht.DHT11(Pin(17))4. Create a while True loop to continually run the code within it.
while True:5. Pause for two seconds and then take a reading using the DHT11.
   time.sleep(2)
   sensor.measure()
6. Get the temperature and store it in an object called “temp”.
temp = sensor.temperature()7. Print a message to the Python shell, followed by the current temperature as part of a sentence. We’re using string formatting to insert the temperature data as a string in the correct part of the sentence.
   print("Temperature Checker")
   print('The temperature is:', "{:.1f}ºC\n".format(temp))
8. Save the code to the Raspberry Pi Pico as main.py This will force the code to run when the Raspberry Pi Pico is powered up.
Complete Code Listing
from machine import Pin
import time
import dht

sensor = dht.DHT11(Pin(17))

while True:
   time.sleep(2)
   sensor.measure()
   temp = sensor.temperature()
   print("Temperature Checker")
   print('The temperature is:', "{:.1f}ºC\n".format(temp))
Using Tio’s default settings
The default Tio settings will often get the job done, and with that in mind, Tio makes it easy to use them. All we need to do is call the tio command along with the path to the device. But how can we locate the device? Tio has just the feature. So let’s step through how to use Tio, starting with identifying the correct serial device, and then connecting to it. In this case it is a Raspberry Pi Pico 2 running MicroPython.
1. Close Thonny. Thonny, and other applications designed for working with microcontrollers, have their own serial communications features which could interfere.
2. Open a terminal and discover which device name your Raspberry Pi Pico has been assigned. In our case it was /dev/ttyACM0, but it could be something different.
tio -l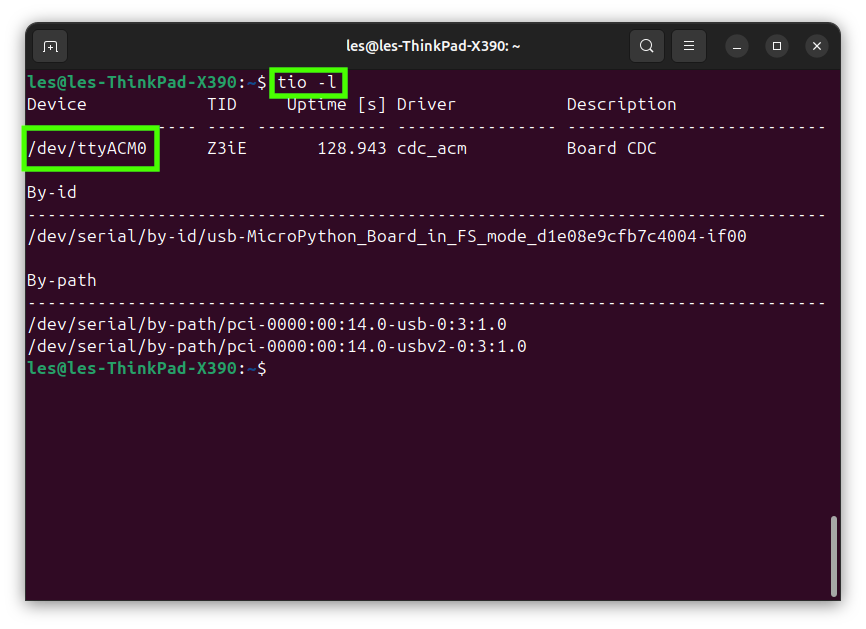
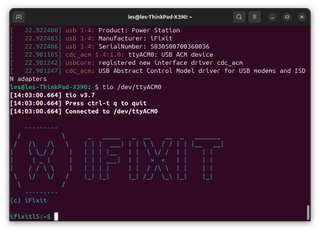
3. Use tio to connect to the Raspberry Pi Pico.
tio /dev/ttyACM04. You should now see the serial output in the terminal. Every second a new temperature reading will appear on the screen. Pressing CTRL + C will break the running code, and drop you into an interactive Python Shell where commands can be entered.

5. To close tio, press CTRL + t then press Q.
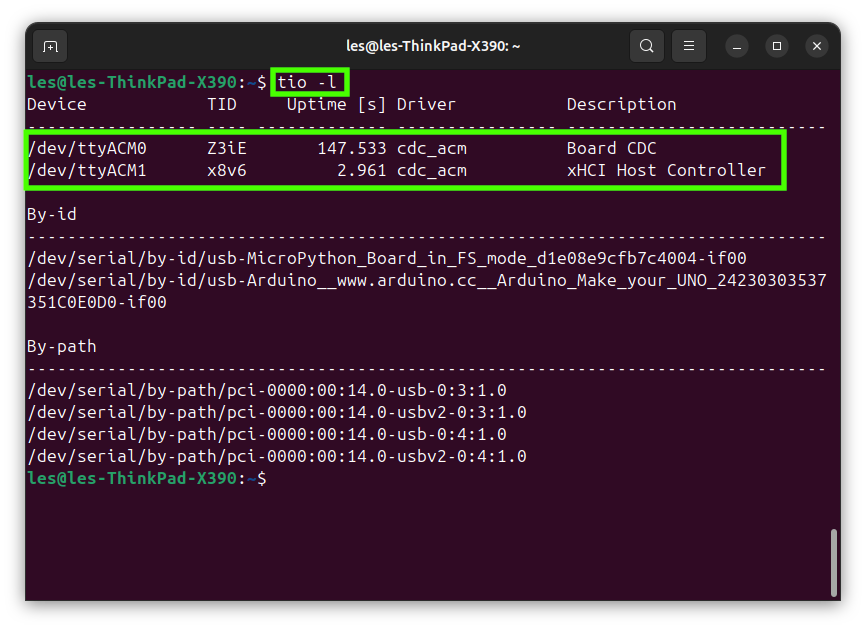
Tio’s list command tio -l will list all devices capable of a serial connection, including multiple devices connected at once. Here we have the Raspberry Pi Pico 2 and an Arduino Uno connected at the same time.
Specifying the connection settings
By default, Tio will use 115200 8N1, in other words.
- 115200: This is the baud rate, the rate at which data is communicated.
- 8: This is the databits, describing how a character of data is sent from a serial device.
- N: This is the parity bit sometimes called a check bit. It is used for error detection.
- 1: This is the stop bit, effectively identifying when the data stream ends.
The 115200 baud rate is pretty common these days and many boards, from Arduino to the new Raspberry Pi Pico 2
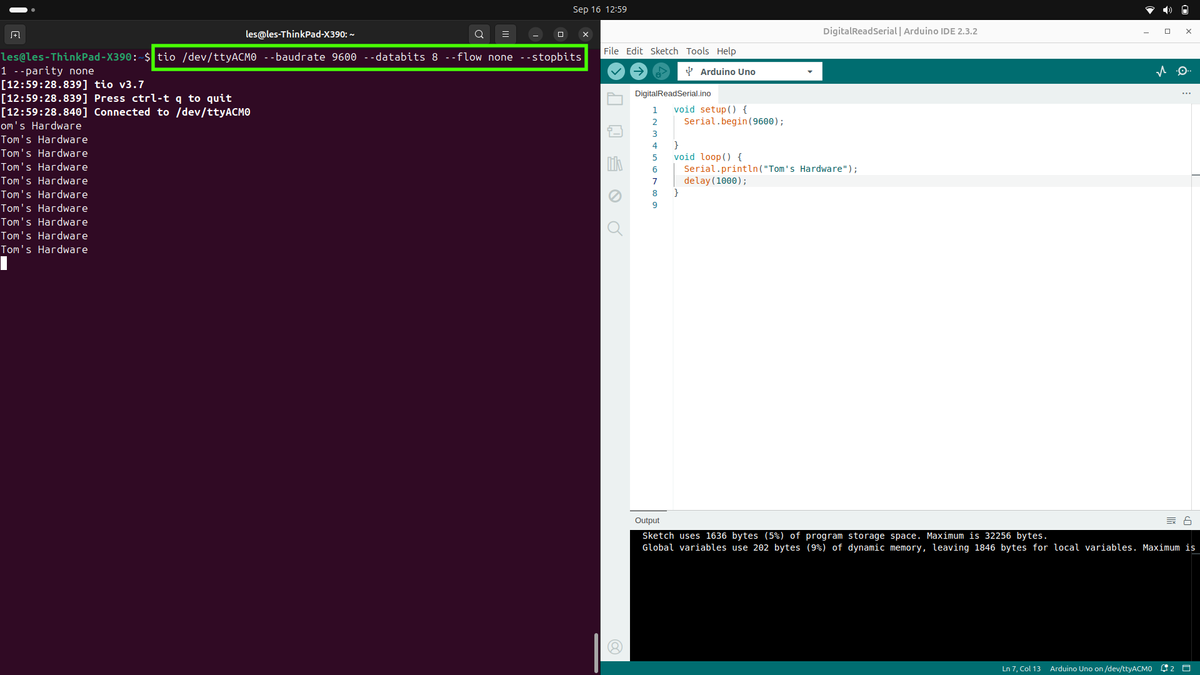
With Tio, we can specify the connection settings to match the needs of the device. In this example we have created a simple Arduino sketch to print “Tom’s Hardware” every one second to the Serial interface. In the Arduino sketch we have hard coded the baud rate to 9600 (Serial.begin(9600)).

These few steps are more for a reference, should you need to specify the connection settings.
To set Tio’s baud rate we need to run the command with some extra arguments.
1. Open a terminal and start tio with arguments to set the baud rate to 9600, databits to 8, flow to none, stop bits 1 and parity to none.
//code//
tio /dev/ttyACM0 –baudrate 9600 –databits 8 –flow none –stopbits 1 –parity none
//code//
2. The live serial data will print to the tio shell, check that the message scrolls up the screen.
3. Press CTRL + t then press Q to exit Tio and return to the terminal.
Writing data to a log file
One rather useful feature is setup when we use the Tio command. The feature in question directs a copy of the output to a log file.
Using the Raspberry Pi Pico temperature sensor project, we will capture the output to a text file called temperature-log.txt.
1. From the Linux terminal, start Tio with two arguments. The first is –log-file which specifies the full path to the file (tio will create the file if it doesn’t exist, and overwrite any existing files with the same name), the second is -L which enables writing to a log file. Remember to change the device path to match that of your device.
tio /dev/ttyACM0 –log-file temperature-log.txt -L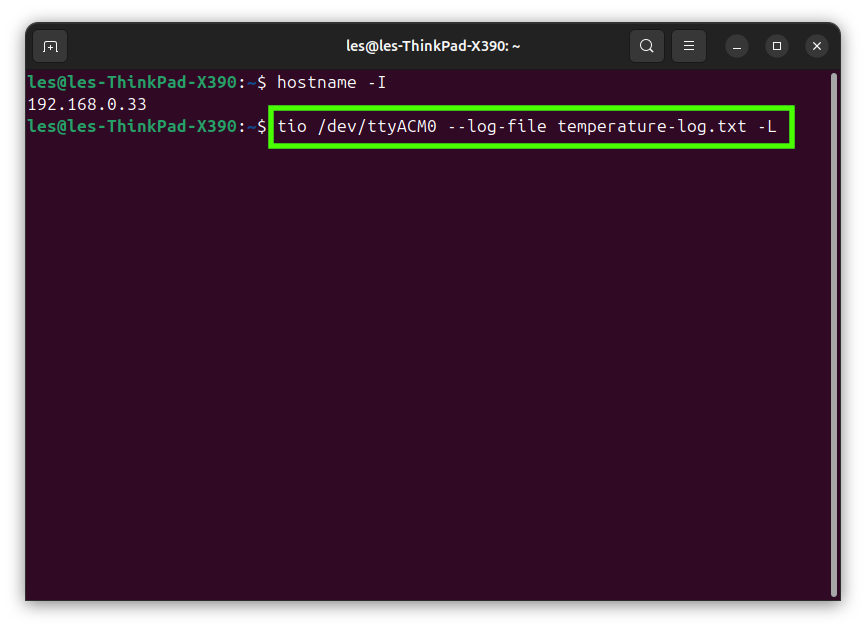
2. Run Tio for a few moments, enough to gather the data that you need.
3. Press CTRL + t then press Q to exit Tio and return to the terminal.
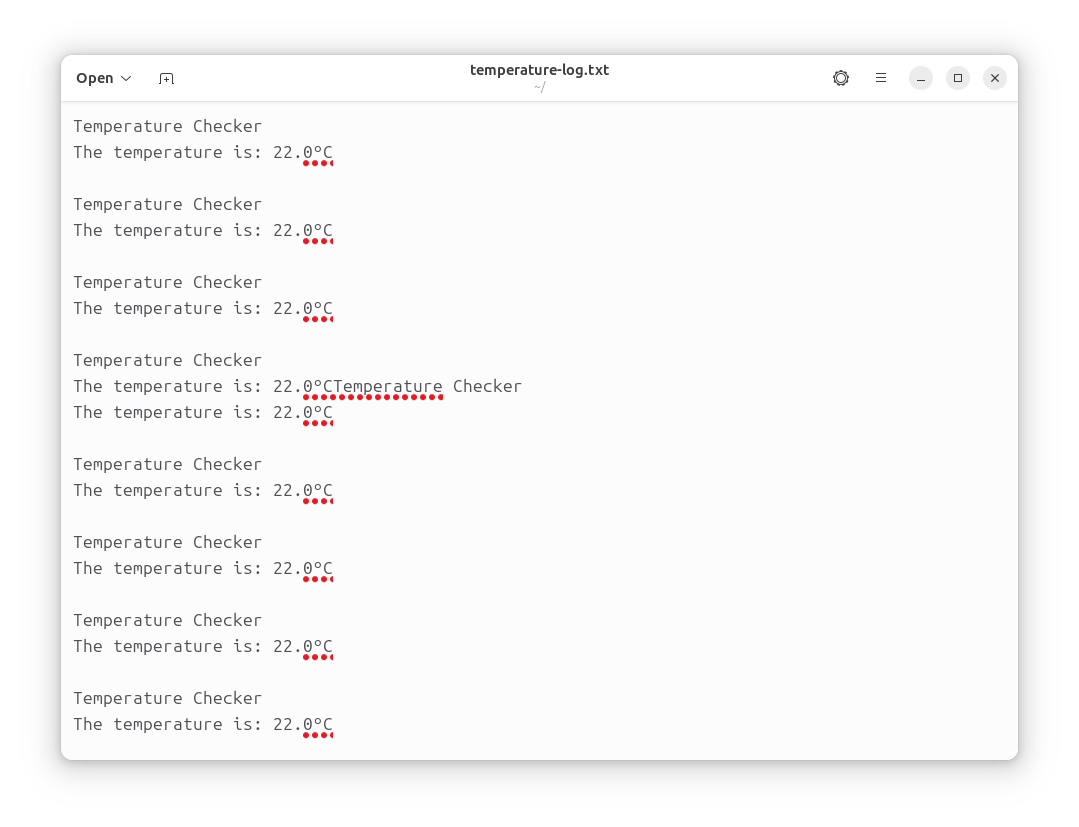
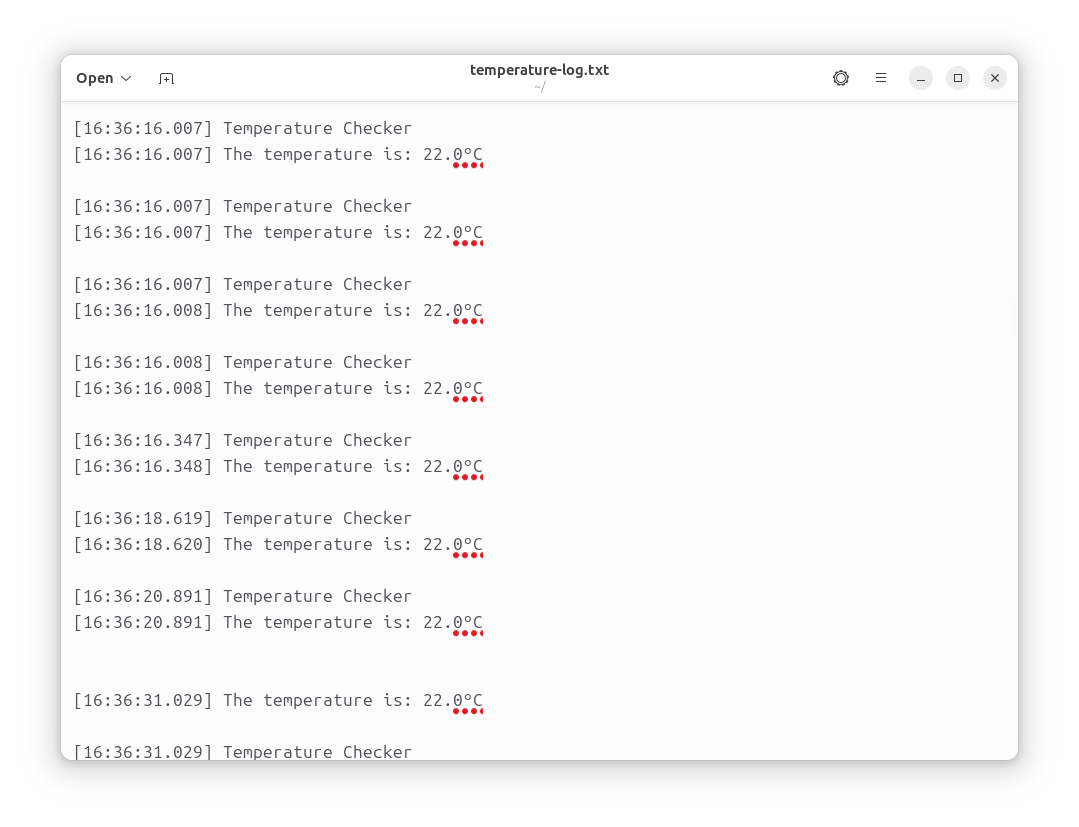
4. Open the file in a text editor to view the data log.
5. Alter the command to add the corresponding argument which will append to an existing log file.
tio /dev/ttyACM0 –log-append –log-file temperature-log.txt -L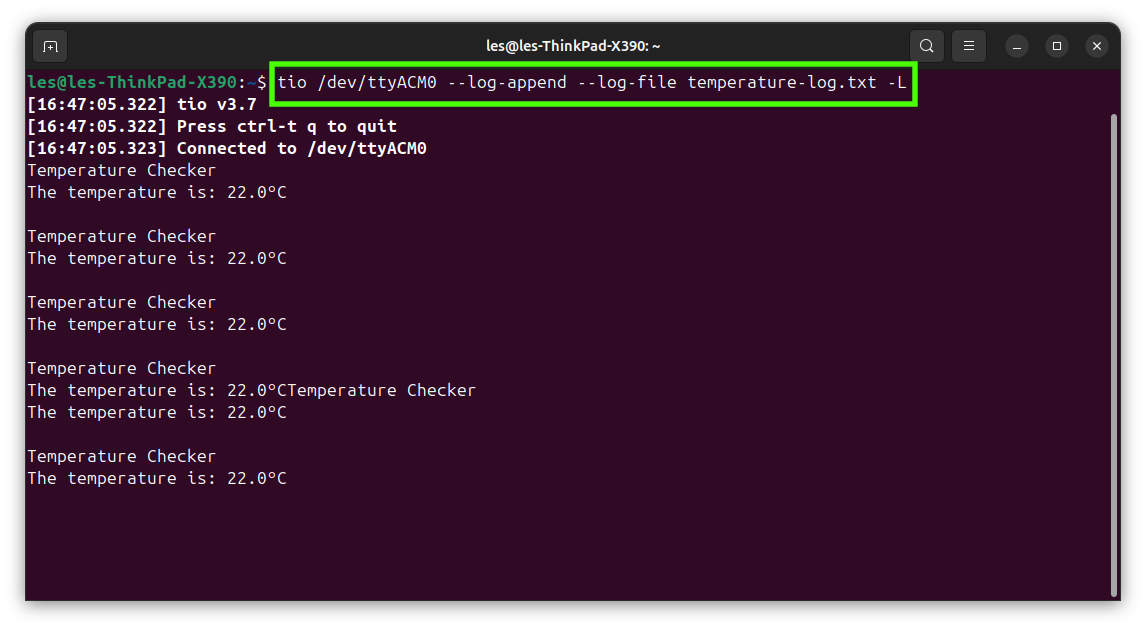
6. Open the text file to see the appended data.
Let’s assume that we need to write the exact time to the log file, this could be useful when we need to show that a certain action should happen at a regular occurrence. We’ll adapt the above command, which appends data to a logfile, so that a timestamp is added at the start of each line.
7. From the Linux terminal, start Tio with the previous arguments, and -t to add a timestamp.
tio /dev/ttyACM0 –log-append –log-file temperature-log.txt -L -t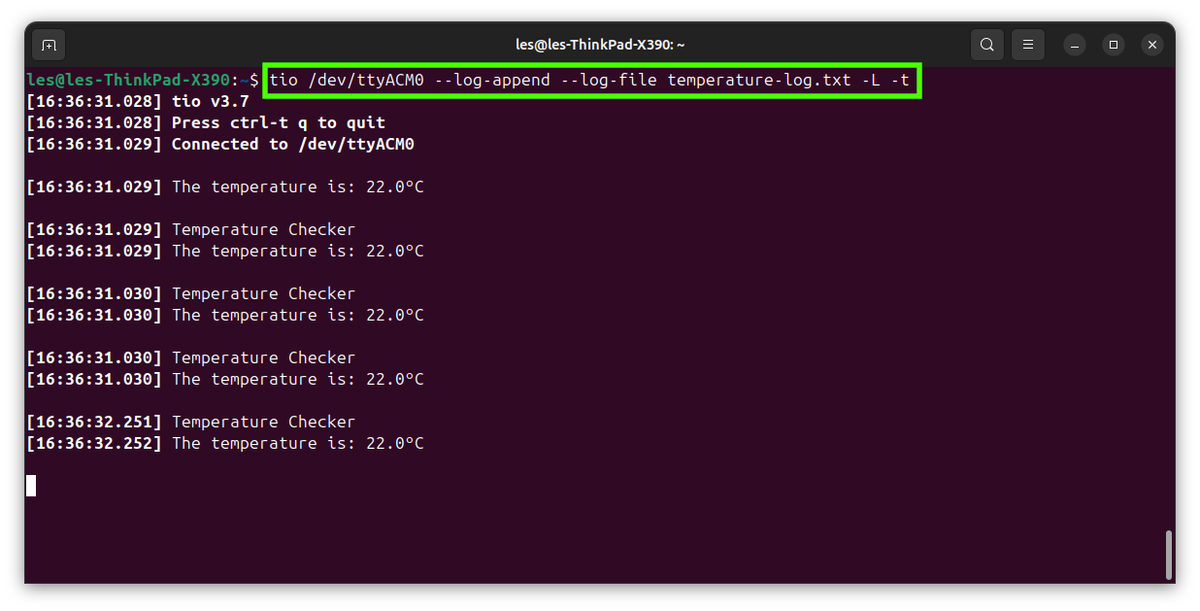
8. Press CTRL + T then press Q to exit Tio and return to the terminal.
9. Open the file in a text editor to view the data log. The timestamp is displayed at the start of each line, just before the output.
Tio’s Advanced Functions
Tio has a slew of extra features and functions which are available while it is running. The features can be accessed by pressing and releasing CTRL + t and then one of the following keys. We’ve already used CTRL + t q which exits Tio.
CTRL+t ?  List available key commands
CTRL+t b  Send break
CTRL+t c  Show configuration
CTRL+t e  Toggle local echo mode
CTRL+t f  Toggle log to file
CTRL+t F  Flush data I/O buffers
CTRL+t g  Toggle serial port line
CTRL+t i  Toggle input mode
CTRL+t l  Clear screen
CTRL+t L  Show line states
CTRL+t m  Change mapping of characters on input or output
CTRL+t o  Toggle output mode
CTRL+t p  Pulse serial port line
CTRL+t q  Quit
CTRL+t r  Run script
CTRL+t R  Execute shell command with I/O redirected to device
CTRL+t s  Show statistics
CTRL+t t  Toggle line timestamp mode
CTRL+t v  Show version
CTRL+t x  Send file via Xmodem
CTRL+t y  Send file via Ymodem
CTRL+t CTRL+t Send CTRL+t character #connect #serial #devices #Tio #Linux