
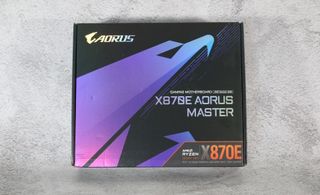
Gigabyte X870E Aorus Master Review: Solid performance, fast M.2, ample USB
Gigabyte, like the other major board partners, has also joined the AMD X870/X870E chipset party with several new SKUs. In our lab now is the upper mid-range X870E Aorus Master, which, like its peers, promises native USB 4.0 and Wi-Fi 7. It also offers an updated design, robust power delivery, fast memory support listed to DDR5-8600(OC), several “EZ” features, and more, for just under $500.
Gigabyte shows up to the X870/X870E party with nine SKUs listed on its website. The full lineup consists of the X870E Aorus Master ($499.99), X870E Aorus Pro/Pro Ice ($359.99), X870E Elite ($319.99), X870 Elite Ice ($289.99), X870 Gaming X WIFI 7 ($289.99) Gaming WIFI 6 ($219.99), the X870 Aorus Elite WIFI 7 ($289.99), and a new Eagle WIFI 7 motherboard SKU ($229.99). So far, we don’t see any Micro-ATX or Mini-ITX boards, but perhaps we’ll see one in 2025 with the B840/B850 chipset. There’s an updated SKU for everyone outside of the smaller form factor boards. With these new boards, Gigabyte has also given up charging more for white motherboards. Now, they cost the same as their dark counterpart.
Hardware-wise, the X870E Master has everything you’d expect from the platform. You get dual USB 4.0 (40 Gbps) Type-C ports and 10 more USB Type-A ports of varying speeds on the rear IO. There are a total of four M.2 sockets (three PCIe 5.0-capable) and four SATA ports for storage, three full-length expansion slots, beefy cooling solutions, hassle-free assembly with EZ-Latch Click/Plus, EZ-Match magnetic attachment system for M.2, and even the Wi-Fi EZ plug. Finally, Gigabyte uses a high-quality (though not the latest generation) audio solution. In all, this is a beefed-up, more capable board compared to its previous-gen counterpart.
The X870E Aorus Master tested well with our new Ryzen 9 9900X processor. In fact, it leads our initial testing grouping in several benchmarks. From rendering to general office work and video and photo editing, this board gets the most out of any installed processor. Granted, the performance differences are more measurable than noticeable, but the new Master still came out on top in many instances. If you’re primarily a gamer, it also showed good performance there in the both of our games and synthetic tests.
Below, we’ll examine the board’s details and determine whether it deserves a spot on our Best Motherboards list. But before we share test results and discuss details, we’ll list the specifications from Gigabyte’s website.
Specifications of the MSI MPG X870E Carbon WIFI
| Socket | AM5 (LGA 1718) |
| Chipset | X870E |
| Form Factor | ATX |
| Voltage Regulator | 20 Phase (16x 110A SPS MOSFETs for Vcore) |
| Video Ports | (2) USB 4 (Type-C) (1) HDMI (v2.1) (1) Front HDMI (v2.1) |
| USB Ports | (2) USB 4.0 (40 Gbps) Type-C (4) USB 3.2 Gen 2 (10 Gbps) (4) USB 3.2 Gen 1 (5 Gbps) (2) USB 2.0 (480 Mbps) |
| Network Jacks | (1) 5 GbE |
| Audio Jacks | (2) Analog + SPDIF |
| Legacy Ports/Jacks | ✗ |
| Other Ports/Jack | ✗ |
| PCIe x16 | (1) v5.0 (x16, x8/x8) (1) v4.0 (x4) (1) v 3.0 (x4) |
| PCIe x8 | ✗ |
| PCIe x4 | ✗ |
| PCIe x1 | ✗ |
| CrossFire/SLI | ??? |
| DIMM Slots | (4) DDR5-8600(OC), 256GB Capacity |
| M.2 Sockets | (3) PCIe 5.0 x4 (128 Gbps) / PCIe (up to 110mm) (1) PCIe 4.0 x4 (64 Gbps) / PCIe (up to 110mm) |
| SATA Ports | (4) SATA3 6 Gbps (Supports RAID 0/1/10) |
| USB Headers | (1) USB v3.2 Gen 2×2 (20 Gbps) Type-C (2) USB v3.2 Gen 1 (5 Gbps) (2) USB v2.0 (480 Mbps) |
| Fan/Pump Headers | (8) 4-Pin (CPU Fan/Water cooling/System) |
| RGB Headers | (4) aRGB Gen 2 (3-pin) (1) RGB strip (4-pin) |
| Diagnostics Panel | (1) Post Status Checker (4 LEDs) (1) 2-character Debug LED |
| Internal Button/Switch | (1) Power button (1) Reset button (programmable) |
| SATA Controllers | ✗ |
| Ethernet Controller(s) | (1) Realtek 8126 (5 GbE) |
| Wi-Fi / Bluetooth | Qualcomm QCNCM865 Wi-Fi 7 – 320 MHz, 6 GHz, BT 5.3 |
| USB Controllers | ASMedia ASM4242 |
| HD Audio Codec | Realtek ALC1220 |
| DDL/DTS | ✗ / DTS:X Ultra |
| Warranty | 3 Years |
Inside the Box of the Gigabyte X870E Aorus Master

In the Aorus Master box, along with the board, are several accessories, including SATA cables, the Wi-Fi EZ Plug antenna, and more. Gigabyte even includes a fan to cool the RAM (DDR5 Wind Blade) for when you’re really pushing the speeds. The full accessory stack is listed below.
- Installation guide, stickers
- G-Connector
- Wind Blade DDR5 Fan
- Quick Connect Wi-Fi Antenna
- (2) SATA cables
- 4-pin extension cable
- Velcro (cable management)
- (2) 2-pin temperature sensors
- Microphone
Design of the Aorus Master
Image 1 of 3

The Aorus master also gets a facelift from the previous generation. It still uses a black 8-layer PCB with black VRMs and grey heatsinks on the M.2 sockets and chipset. They’ve added mirror-like surfaces and moved the Falcon emblem to the chipset area, flexing its muscles between the PCIe slots. RGBs light up the “I/O Zone” with Aorus branding and from under the chipset heatsink. There’s no significant difference between this and the previous generation regarding appearance, but I still like the clean lines on the Aorus product stack.

Starting our board tour in the upper-left corner, we first run into the two (one-required) 8-pin EPS connectors to power the processor. As part of the Thermal Guard design, Gigabyte uses a ‘fins-arrary’ to cool the powerful VRMs below. And holes have been punched in the rear IO plate to help with airflow. On the left VRM bank is the only RGB element on the board. Here, Gigabyte uses the Aorus branding and perspective to create a cool-looking design that brightens up the inside of your case. Control over any integrated or attached RGBs comes from the RGB Fusion app within the Gigabyte Control Center (GCC).
Past the socket on the right, we next encounter the four DRAM slots (the two primary are reinforced), with locking mechanisms on both sides. Gigabyte uses daisy-chain topology with shielded routing and lists support for up to a smoking-fast DDR5-8600(OC). We didn’t have any issues up to DDR5-7200, but like the MSI board, our DDR5-8000 kit booted but didn’t want to pass our stability test. There is a set of DDR5-8000 sticks from Klevv on the memory QVL, but it wasn’t ours. As usual, stick to the QVL list for the best chance of high-speed memory to work without tweaking settings.
Just above the DRAM slots are the first two 4-pin fan headers (CPU_OPT and CPU_FAN). Each header supports PWM- and DC-controlled devices and outputs up to 2A/24W, so there should be plenty of power for fans, AIO cooling systems, or even custom water cooling. Unlike the MSI board, the Aorus Master doesn’t have a supplemental power connector for additional support. The GCC controls the fans with presets (Silent, Normal, Full Speed), sensors, or manually.
Next, we have the first set of RGB headers if you need to add bling to your chassis. In this case, two 3-pin (aRGB) sit up top, with the other two along the bottom edge. The EZ-Debug Zone in the upper right corner is where we find the Debug LEDs, power button, voltage measurement points, and the programmable (through the BIOS) reset button. Shifting focus down the right edge is the 24-pin ATX connector for board power. Remember those included temperature sensors we mentioned earlier? They plug in just behind the ATX connector on the two 2-pin headers. Doing so adds another set of sensor readings you can use to to adjust your fan curves. Below is a uniquely placed HDMI (v2.1) video output and the front panel USB 3.2 Gen 2×2 (20 Gbps) Type-C connection.
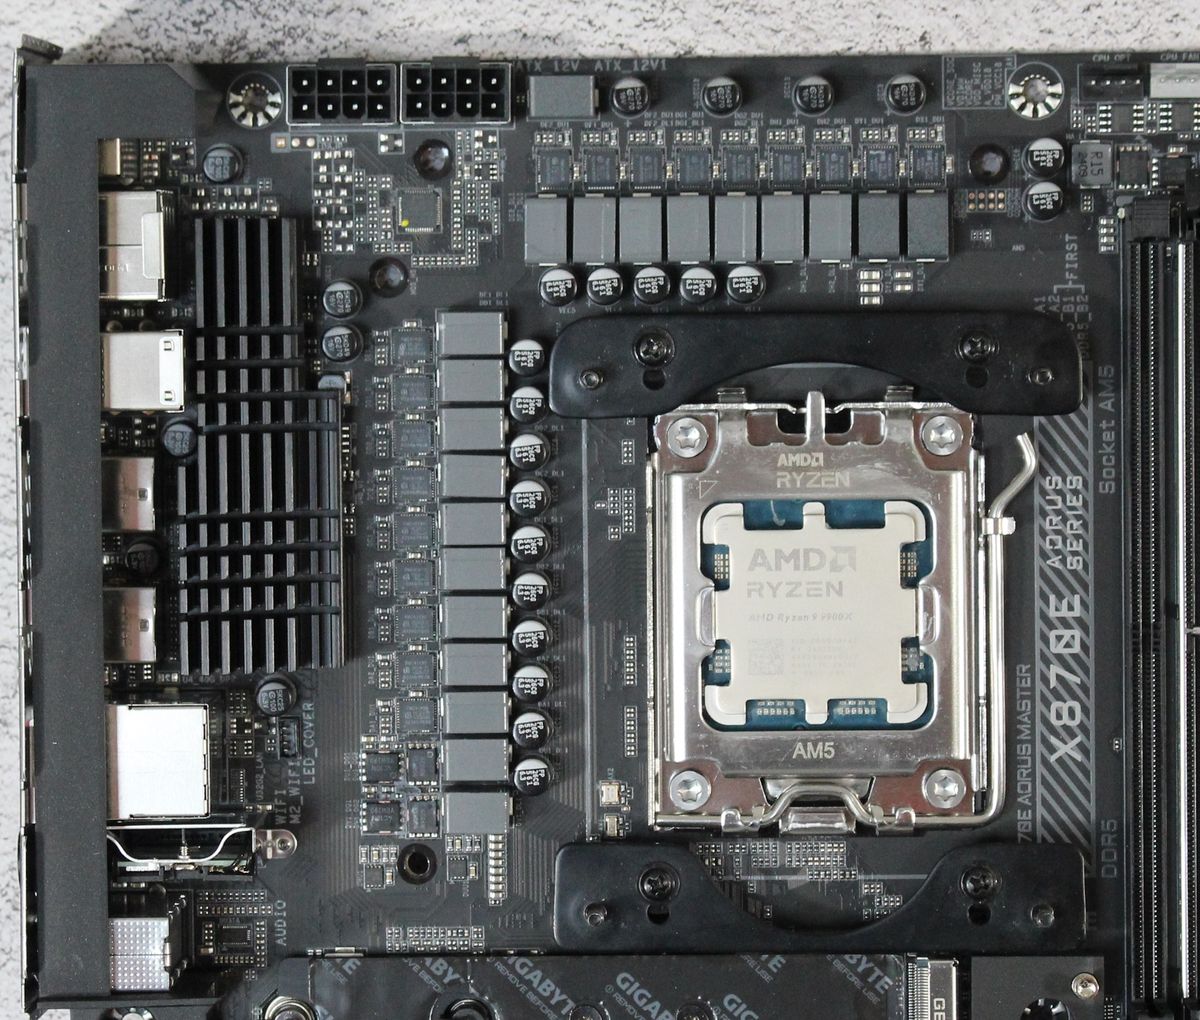
Power delivery on the Aorus Master consists of 20 phases, with 16 dedicated to Vcore. Power heads from the 8-pin EPS connector(s) to a 12-channel Infineon XDPE192C3B controller. The next stop is to the 16 110A Infineon PMC41430 SPS MOSFETs in a ‘teamed’ configuration. The 1,760A available to the CPU is enough for our Ryzen 9 9900X and the flagship 9950X. You’ll be limited by cooling before the power delivery gets in the way.

Swinging focus to the bottom, we’ll start on the left side of the board, where we see a mostly exposed audio section. There are several different capacitors, including the red WIMA and the Realtek ALC1220 7.1 channel audio codec. It’s not the latest and greatest available, but it’s still a high-quality audio solution.
Three full-length PCIe slots and four M.2 sockets reside in the middle of the board. Starting with the PCIe slots, the reinforced top slot connects through the CPU and runs at PCIe 5.0 x16 (or x8) speeds (assuming you have a Ryyzrn 9000/7000 series – 8000 series APUs run at PCIe 4.0 x8 or x4). This slot shares bandwidth with M2B_CPU and M2C_CPU connectors. As such, the slot drops to PCIe 5.0 x8 when these are populated. The other two PCIe slots connect through the chipset and run at PCIe 4.0 x4 and PCIe 3.0 x4 (middle/bottom).
The top M.2 socket under the large heatsink (M2A_CPU) connects through the CPU and runs at PCIe 5.0 x4 (128 Gbps) speeds. It’s the only PCIe 5.0 M.2 socket that doesn’t affect the PCIe slot bandwidth. Below that, and under the M.2 EZ Match heatsink (covers three M.2s), is the PCIe 4.0 x4 (64 Gbps) socket, while the bottom two are the other PCIe 5.0 x4-capable sockets (that share lanes with the top PCIe slot). All support up to 110mm modules; for those looking for additional speed or redundancy, they support RAID0/1/10 modes.
Continuing right and moving past the chipset, along the edge of the board are four SATA ports (which also support RAID0/1/5/10). Below is the 19-pin USB 3.2 Gen 1 (5 Gbps) connector and three more 4-pin fan headers mounted horizontally for a cleaner appearance.
Across the bottom of the board are several exposed headers. You’ll find the usual, including additional USB ports, RGB headers, and more. Below is a complete list from left to right.
- Front panel audio
- (2) 3-pin aRGB header
- 4-pin RGB header
- TPM Header
- System Fan header
- (2) USB 2.0 headers
- 19-pin USB 3.2 Gen 1 (5 Gbps)
- (2) System fan headers
- Front Panel header
- 2-pin Clear CMOS jumper
- 2-pin reset jumper

The backplate on the X870E Aorus Master is full of connectivity, and the black background with white text is easy to read and informative. There are 10 USB Type-A ports (2x USB 2.0, 4x USB 3.2 Gen 1, 4x USB 3.2 Gen 2) and two USB 4.0 (40 Gbps) Type-C ports. If this isn’t enough, there are always the front ports.
Surrounding all of the USB ports are the Clear CMOS and Q-Flash Plus buttons, and an HDMI port to use with the integrated video is on the left. The audio stack with microphone, line-out plugs, and SPDIF optical output is on the right. Next to that is the quick connect Wi-Fi 7 and the Realtek 5 GbE port. Gigabyte also added some venting on the IO plate to help with airflow around the VRM, though it is not actively cooled.
MORE: Best Motherboards
MORE: How To Choose A Motherboard
MORE: All Motherboard Content
#Gigabyte #X870E #Aorus #Master #Review #Solid #performance #fast #M.2 #ample #USB