
How to Find All of Sirak’s Logs
The launch of the Shattered Space DLC for Starfield has brought with it a slew of new adventures for the player. Not only are there new quests added to the game, but also new collectibles that serve to flesh out the new galaxy you are exploring.
One such set of collectibles can be found during the What Remains questline, and they aren’t the easiest to track down. Given that they do not play a direct role in completing the quest, you may ignore them entirely, but we’re going to tell you how to find all of Sirak’s logs in Shattered Space.
How to Begin the What Remains Quest in Shattered Space?
Bethesda open-world games have always let you stumble into adventures, for the most part. However, there is some direction given early on, and the same can be said for the new Starfield DLC.
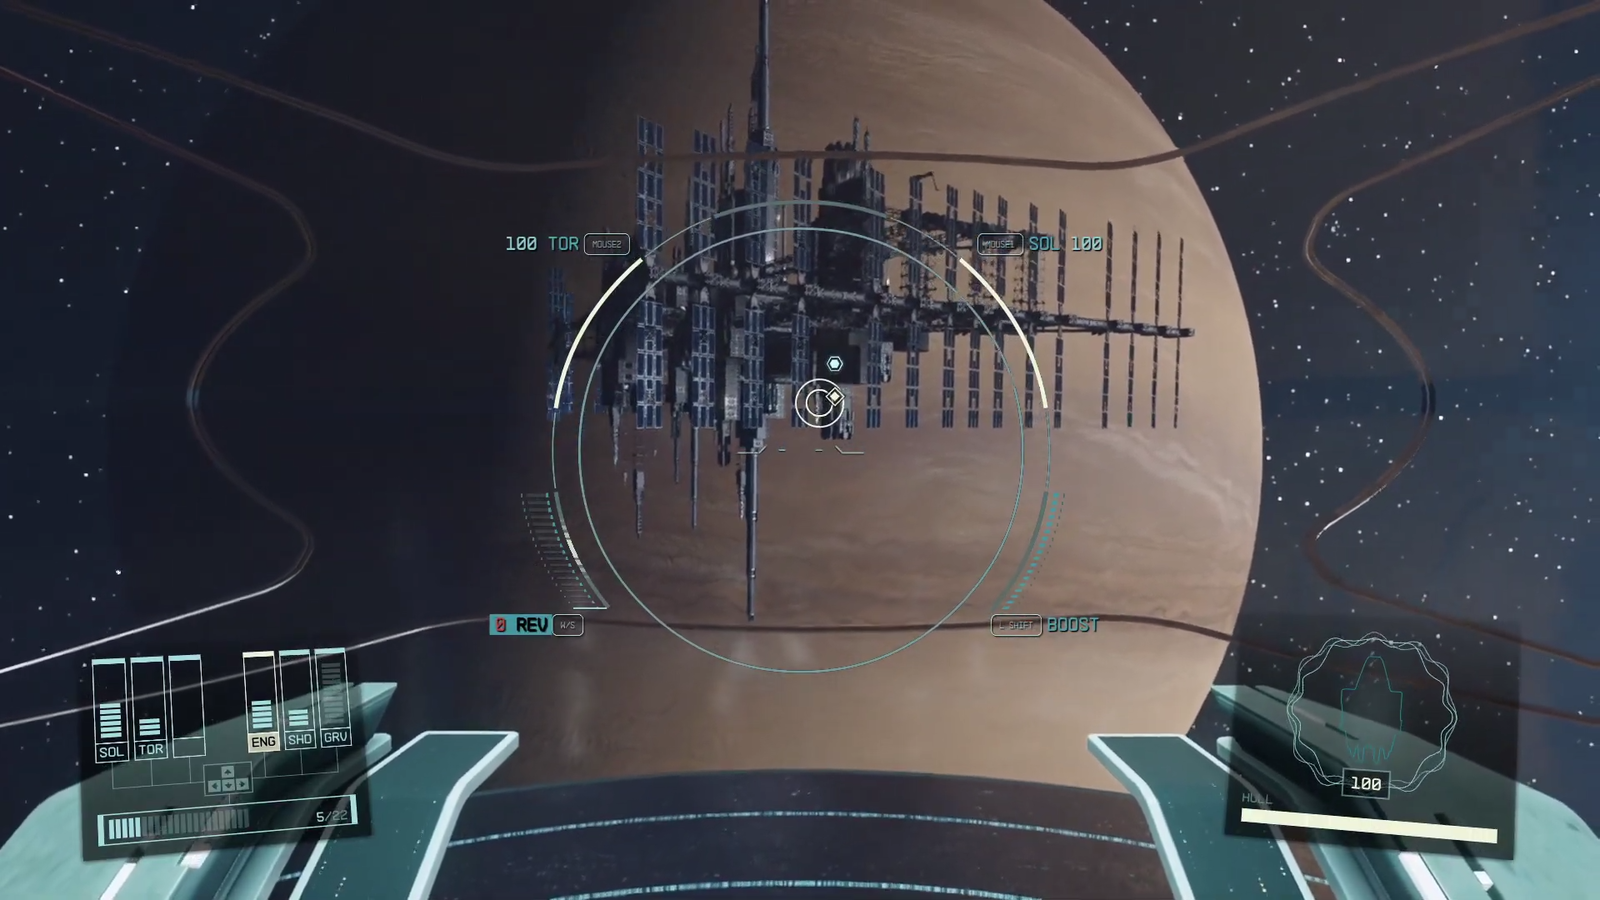
What Remains is going to be the first mission many would take on, as you will encounter a distress call from the Oracle Space Station, asking you not to board. Very clearly, an open invitation to come aboard.
This distress call has come from Sirak Veth’aal, and it will be his logs you will be hunting down. The location you will be visiting is an abandoned star station, but it’s not quite as empty as you would have expected.
Be prepared for some zero-gravity combat, and make sure you bring your most powerful weapons to ensure your adventures in Shattered Space don’t end as soon as they begin.
Once you’ve received the distress call, you will be able to track down the Oracle and board it without much difficulty as long as you follow our guide on how to dock your ship in space.
Tip
The recommended level for this mission is 35, but this is not a requirement to complete the mission.
Your adventure will begin as soon as you step foot on the ship and begin exploring, but the mission objectives won’t require you to collect Sirak’s logs. Doing so will give you a better understanding of what transpired in this location, so here are all Sirak’s log locations in Starfield.
Sirak’s Log #1
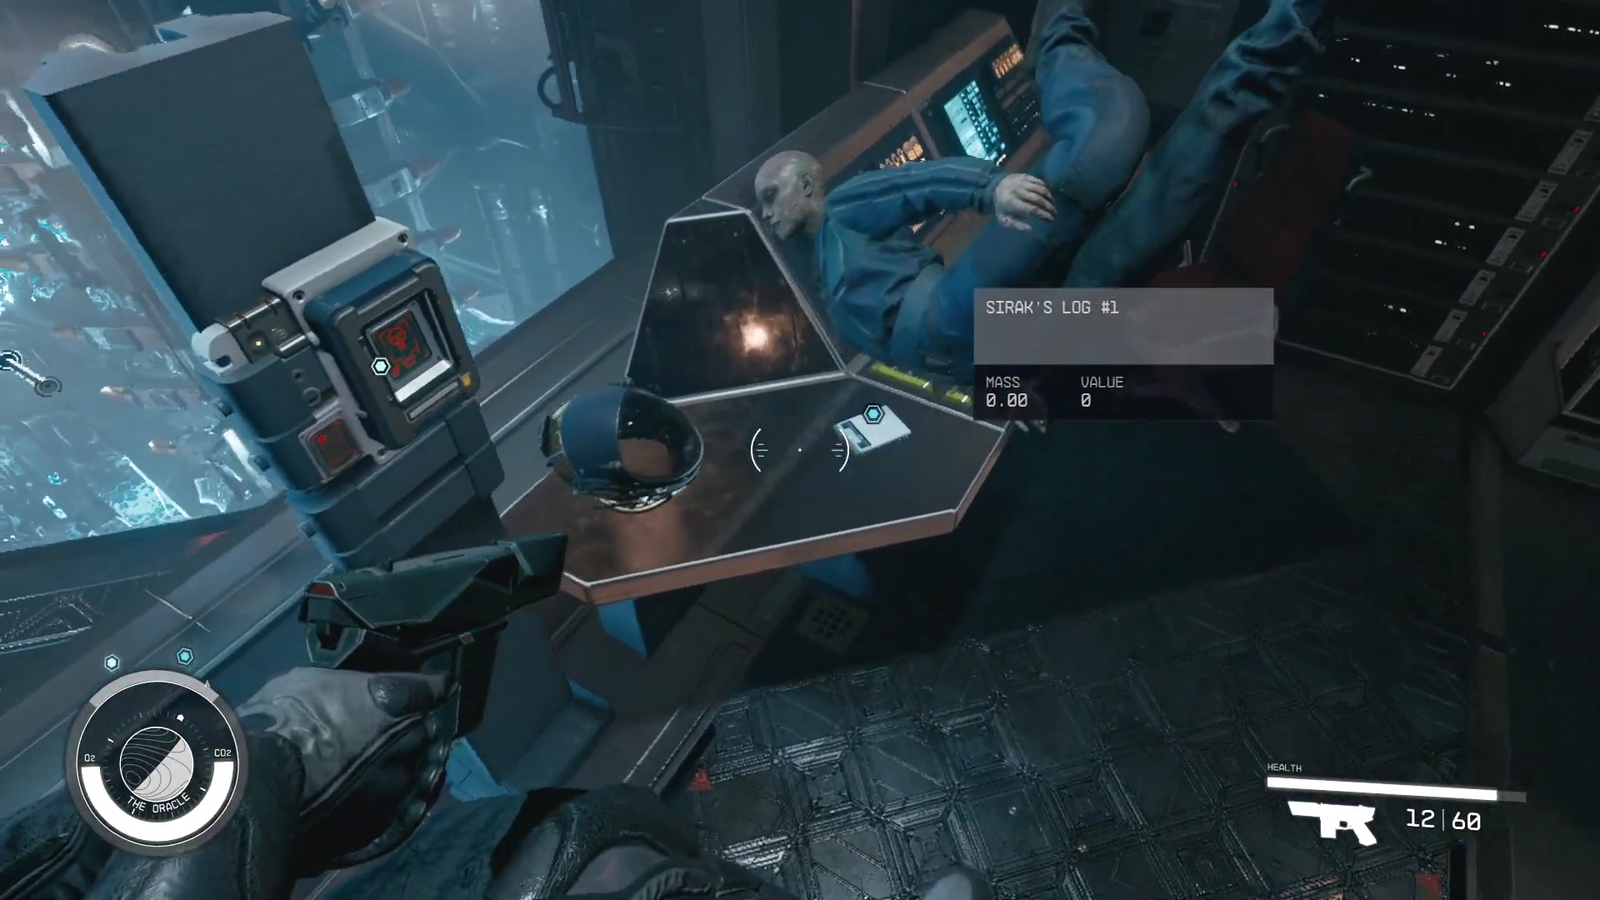
Once you are on the Oracle, you will be able to find the first of the four logs very early on. Follow the objective markers, as they are pretty straightforward, and you will then witness an interaction between two characters.
One is Sirak, the creator of the logs, and the other is Basira. Once this interaction ends, Basira will turn hostile, so make sure you have some strong weaponry to take her down.
Tip
With the right weapons, you can take down Basira before she has the chance to deal serious damage and loot her body to get the Oracle Access Card.
You will once again spot Sirak, and he will mention how power needs to be restored. This is when the optional objective to track down his logs will be added. You can continue the mission by using the Access Card. You will also encounter two Vortex Phantoms, then follow the path on the right to the end. You will find the first log on the desk in the room to your left.
Sirak will narrate how a sudden energy surge occurred when conducting experiments directly above Dazra. This resulted in the ship’s Grav Drive causing a jump to an unknown location where they were attacked by Vortex Phantoms.
Sirak’s Log #2
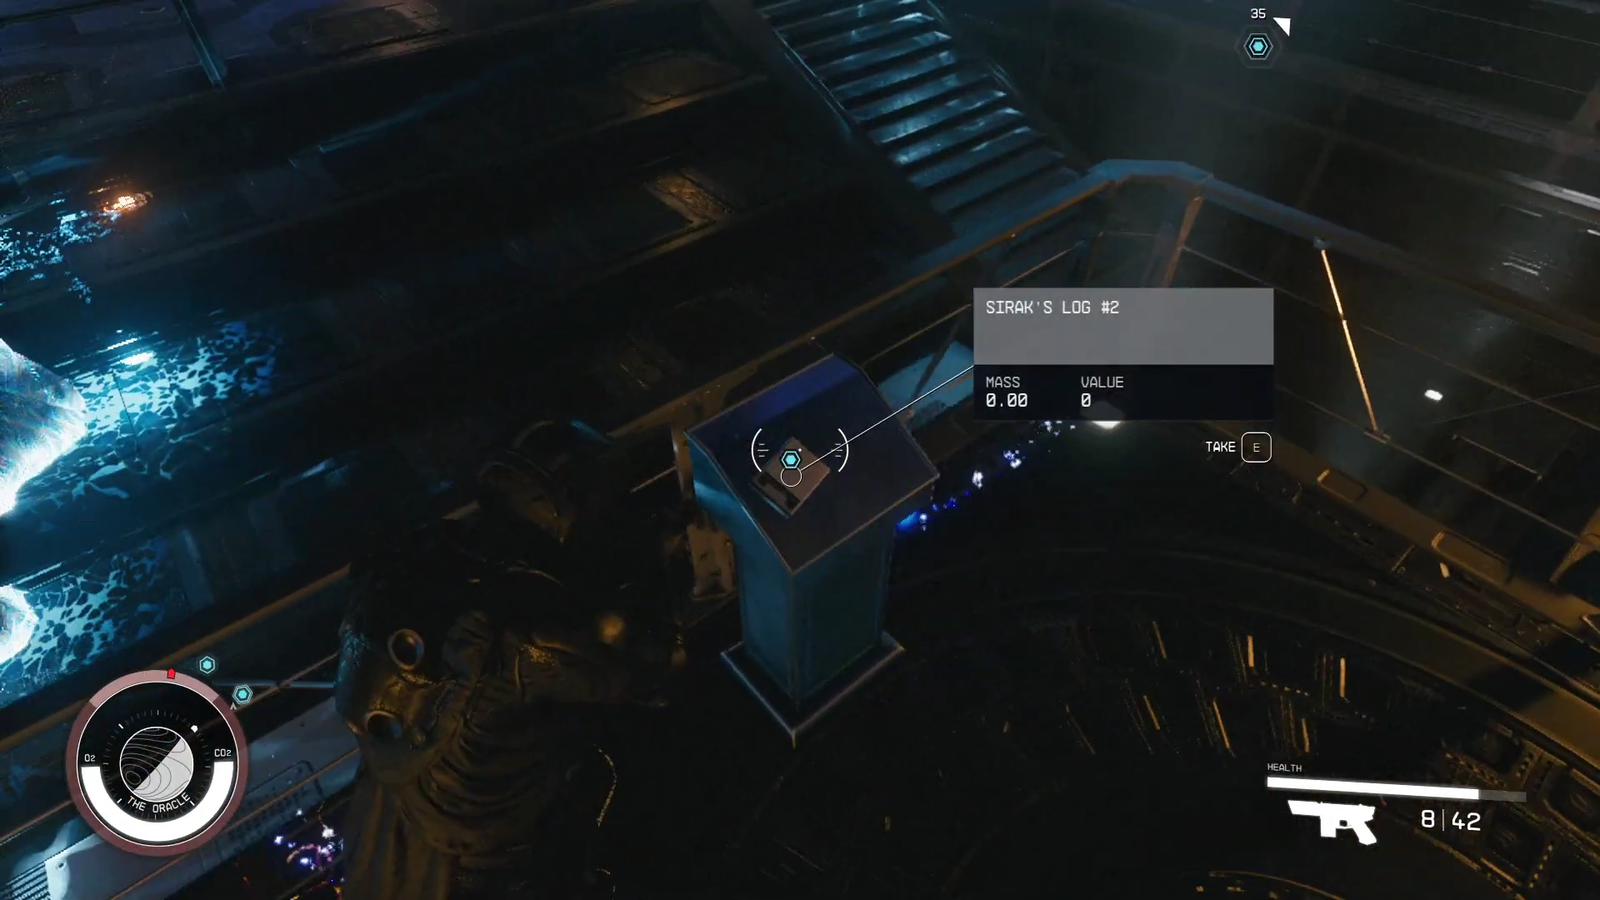
Exit the room, walk down the hall, turn a right, and continue through the control room to open the door at the end. Go down the stairway until you reach the bottom; you’ll find yourself going under the large blue energy orb in the center.
Once you reach the large open room, go over to the other side of the platform, and you will find the second of the Sirak log locations on a small pedestal.
This log will have Sirak saying how particular areas within the ship have been sectioned off with the use of energy barriers. He also remarks how the energy patterns in these barriers are the same as the ones they were studying for Anasko’s experiments, alluding to some form of connection between the two.
Sirak’s Log #3
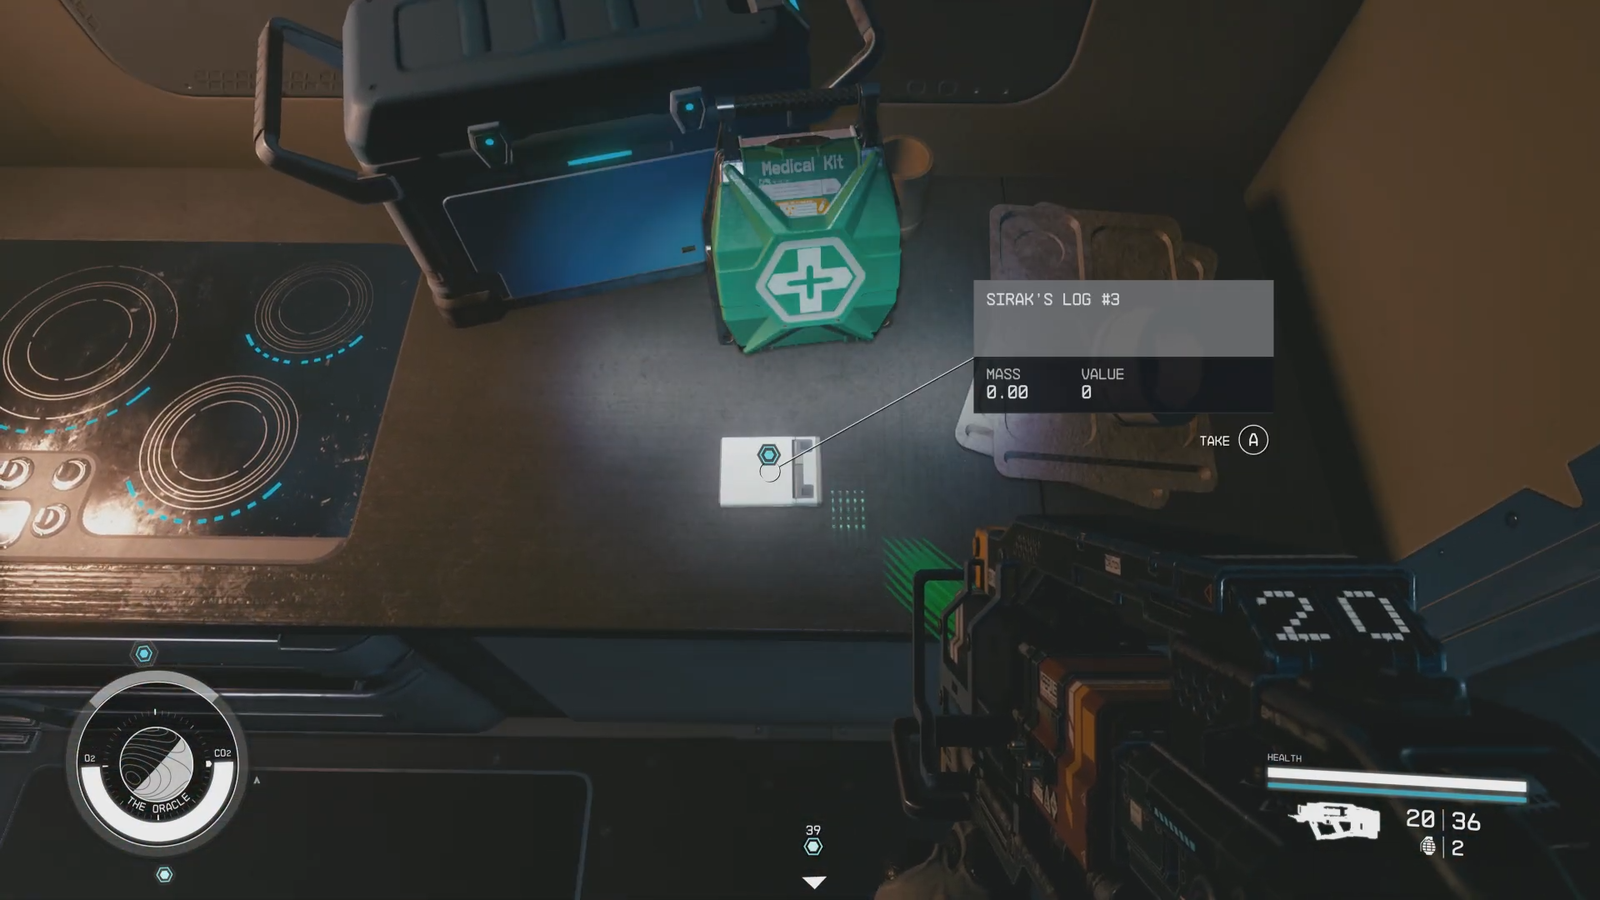
With the second log in your inventory, follow the waypoint marker until you come to a cafeteria. You’ll encounter another one of the Vortex Phantoms here, so keep your gun at the ready. Open the orange door close to the corner of the room, continue down the hall, and then reach the bottom by jumping over the railing.
You will now have to complete a small puzzle to get the Engineering Access Card and the next log. There are six numbered sections on the wall in front of you, along with some panels that are numbered 1, 3, and 5.
Press number 3 to have that wall section open up and then walk through to the hidden room behind. Head towards the console area after defeating the next Starfield Vortex Phantom, and you’ll spot a hatch on the floor.
Go down this hatch and follow the path through the shower area until you reach what looks like a barracks or dormitory. Move to the right, ascend the stairs, and turn into the room to your left. Another Vortex Phantom awaits you here, and you can make short work of it with the right weapon mods. With the Phantom dealt with, pick up the Access Card from the bed.
The third log will be on a platform, right by where you get the card. This one will talk about how the Oracle Station is experiencing randomized Grav Jumps, and the constant exposure to energy is sapping the crew’s life.
Sirak’s Log #4

The final log will require you to travel back to where you found the first one. This can be done after completing the mission objectives to restore gravity on the ship and taking out the many other Vortex Phantoms along the way. The terminal you were previously unable to access can now be reached with the Engineering Access Card.
Interact with the Terminal and select the option to reconnect the secondary power cell, a process that will fail. You will then hear Sirak stating that turning on the gravity might be able to pull the cell into place, and this requires you to make your way to the Control Room. Go up through the passage, and you will find a corridor with a cabin that houses the large blue energy sphere.
Enter this cabin, and you will find the last of Sirak’s logs in this Shattered Space mission. Sirak shares in his final log how he and four others are the only survivors. He believes it’s only a matter of time before they too fall victim to the energy barrier.
With that, you can complete the quest by following the markers to the mission objectives. Which mission in Shattered Space have you found to be the most engaging? Let us know in the comments below and check out our other Starfield guides to master this DLC!
#Find #Siraks #Logs